Essential DIY AC Repairs Every Homeowner Should Know About

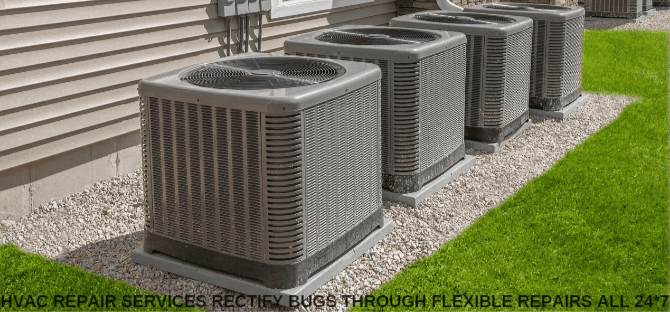
Are you tired of sweating through hot summer days because your AC isn’t working efficiently? Many homeowners face similar challenges, but fear not, as there are essential DIY AC repairs you can perform to keep your cooling system running smoothly.
Ahead in this blog, we’ll walk you through step-by-step instructions for tackling common AC issues. Besides, if you ever require professional assistance, remember that AC Repair South Miami technicians are just a call away.
-
Cleaning the Air Filter:
The air filter is a critical component of your AC system, responsible for trapping dust, pollen, and other airborne particles. A dirty filter can restrict airflow, causing your AC to work harder and consume more energy. Follow these steps to clean or replace your air filter:
- Turn off the power to your AC system.
- Locate the air filter, typically found behind a vent grille or near the air handler.
- Remove the filter and inspect it for dirt and debris.
- Clean reusable filters with a vacuum or wash with mild detergent and water.
- If the filter is disposable, replace it with a new one of the same size and type.
- Reinstall the filter and restore power to your AC system.
-
Clearing Condensate Drain Line:
The condensate drain line removes excess moisture from your AC system. Over time, the drain line can become clogged with dirt, algae, and debris, leading to water backup and potential damage. Follow these steps to clear a clogged condensate drain line:
- Turn off the power to your AC system.
- Locate the condensate drain line, usually located near the indoor air handler.
- Use a wet/dry vacuum or a plumbing snake to remove any obstructions from the drain line.
- Flush the drain line with a mixture of water and vinegar to remove algae and mold buildup.
- Once clear, restore power to your AC system and monitor for proper drainage.
-
Checking and Cleaning Coils:
The evaporator and condenser coils play a crucial role in cooling your home by transferring heat between the indoor and outdoor units. Over time, these coils can accumulate dirt and debris, hindering their ability to absorb and release heat efficiently. Follow these steps to check and clean your coils:
- Turn off the power to your AC system.
- Access the evaporator coil located inside the air handler or furnace unit.
- Use a soft brush or vacuum to gently remove dirt and debris from the coils.
- Inspect the condenser coil located outside your home and repeat the cleaning process.
- Avoid using excessive force or harsh chemicals, as this can damage the coils.
- Once clean, restore power to your AC system and enjoy improved cooling performance.
-
Inspecting and Sealing Ductwork:
Leaky ductwork can waste energy and reduce the effectiveness of your AC system by allowing cool air to escape before reaching your living spaces. Inspecting and sealing ductwork is a simple yet effective DIY repair that improves comfort and lowers energy bills. Follow these steps to inspect and seal your ductwork:
- Turn on your AC system and feel for air leaks around duct joints and connections.
- Use foil tape or mastic sealant to seal any visible leaks or gaps.
- Inspect ductwork in attics, crawl spaces, and basements for signs of damage or deterioration.
- Repair any damaged ducts using duct sealant or replacement sections.
- Insulate ductwork in unconditioned spaces to further improve efficiency.
- Inspecting and Tightening Electrical Connections:
Loose or faulty electrical connections can disrupt the flow of electricity to your AC system, leading to performance issues and potential safety hazards. Regularly inspecting and tightening electrical connections is an essential DIY repair for maintaining a safe and reliable AC system. Follow these steps to inspect and tighten electrical connections:
- Turn off the power to your AC system at the breaker panel.
- Remove the access panel from the air handler or outdoor unit to access electrical components.
- Inspect electrical connections for signs of corrosion, overheating, or looseness.
- Tighten loose connections using a screwdriver or wrench, being careful not to over-tighten.
- Replace any damaged or corroded wires or connectors as needed.
- Once complete, restore power to your AC system and monitor for proper operation.
- Replacing Capacitors:
Capacitors are electrical components that help start and run the motors in your AC system. When capacitors fail, your AC may struggle to start, or the motors may run inefficiently, leading to higher energy bills and potential damage. Follow these steps to safely replace capacitors:
- Turn off the power to your AC system at the breaker panel.
- Locate the capacitors, typically housed in the outdoor unit near the compressor.
- Discharge any stored electricity by shorting the capacitor terminals with an insulated screwdriver.
- Note the capacitance and voltage ratings of the existing capacitors.
- Disconnect the wires from the old capacitors and remove them from the mounting bracket.
- Install the new capacitors, ensuring they match the ratings of the original components.
- Reconnect the wires to the new capacitors.
- Once complete, restore power to your AC system and test for proper operation.
- Cleaning and Straightening Fins:
The fins on your AC’s outdoor unit help dissipate heat and improve airflow, but they can become bent or clogged with debris over time. Cleaning and straightening fins is a simple DIY repair that can enhance cooling performance and extend the life of your AC system. Follow these steps to clean and straighten fins:
- Turn off the power to your AC system at the breaker panel.
- Remove the protective grille or cover from the outdoor unit to access the fins.
- Use a soft brush or vacuum to remove dirt, leaves, and other debris from the fins.
- Carefully straighten any bent fins using a fin comb or butter knife.
- Avoid using excessive force, as this can damage the fins or coil tubing.
- Once clean and straightened, replace the protective grille or cover and restore power to your AC system.
- Inspecting and Lubricating Moving Parts:
Proper lubrication is essential for keeping the moving parts of your AC system running smoothly and efficiently. Without adequate lubrication, friction can cause excessive wear and damage critical components. Follow these steps to inspect and lubricate moving parts:
- Turn off the power to your AC system at the breaker panel.
- Remove the access panels from the air handler or outdoor unit to access moving parts.
- Inspect fan motors, bearings, and other moving components for signs of wear or lack of lubrication.
- Apply a few drops of lubricating oil to any moving parts that appear dry or stiff.
- Avoid over-lubricating, as this can attract dust and debris and cause further damage.
- Once complete, replace the access panels and restore power to your AC system.
- Checking and Replacing Belts:
Some older AC systems use belts to transfer power from the motor to the blower or compressor. Over time, these belts can become worn or damaged, leading to reduced efficiency and performance. Follow these steps to check and replace belts:
- Turn off the power to your AC system at the breaker panel.
- Remove the access panels from the air handler or outdoor unit to access the belt.
- Inspect the belt for signs of wear, cracking, or stretching.
- Measure the length and width of the existing belt to ensure a proper replacement.
- Loosen the tension on the belt by adjusting the motor or pulley position.
- Remove the old belt and install the new one, ensuring it is properly aligned and tensioned.
- Once complete, restore power to your AC system and test for proper operation.
- Testing and Resetting Circuit Breakers:
Circuit breakers are designed to protect your AC system from electrical overload by shutting off power when necessary. However, occasionally, breakers can trip due to issues such as a power surge or short circuit. Follow these steps to test and reset circuit breakers:
- Turn off the power to your AC system at the breaker panel.
- Locate the circuit breaker that controls your AC system and check its position.
- If the breaker is in the “off” position, reset it by firmly switching it to the “on” position.
- If the breaker trips immediately or repeatedly, there may be an underlying issue that requires professional AC Repair South Miami services.
- Once reset, restore power to your AC system and monitor for proper operation.
- Calibrating Thermostat:
The thermostat controls your AC system, regulating temperature and airflow to maintain comfort and efficiency. However, if the thermostat is not calibrated correctly, it can lead to inaccurate temperature readings and inefficient operation. Follow these steps to calibrate your thermostat:
- Turn off the power to your AC system at the breaker panel.
- Remove the cover from your thermostat to access the temperature sensor.
- Use a digital thermometer to measure the temperature at the thermostat location.
- Compare the temperature reading to the setpoint on your thermostat.
- If there is a significant discrepancy, adjust the thermostat calibration accordingly.
- Follow the manufacturer’s instructions for calibrating your specific thermostat model.
- Once calibrated, replace the thermostat cover and restore power to your AC system.
Final Words:
Congratulations on learning essential DIY AC repairs that every homeowner should know about. Following these step-by-step instructions, you can tackle common AC issues and keep your cooling system running smoothly. However, if you encounter complex problems or feel unsure about performing repairs, don’t hesitate to contact professional AC Repair South Miami technicians.
Remember, regular maintenance is key to extending the life of your AC system and maintaining indoor comfort. So, roll up your sleeves and tackle these DIY AC repairs as soon as possible.